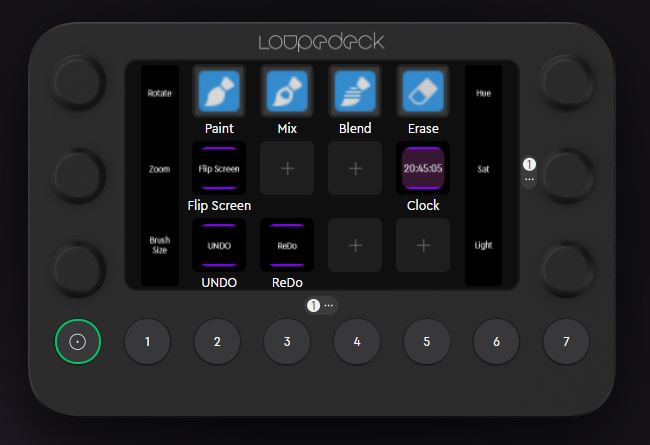
This page provides help and guidance to setup and use the Loupedeck (Live) with Rebelle 5.
I have now added my latest one for Rebelle 6 as well:
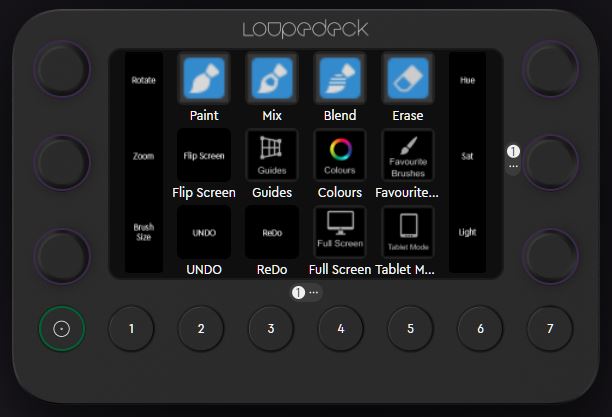
You can help support me by buying the Loupedeck through my Amazon affiliate Link for Loupedeck
Step 1 – Download and Extract the Profile
Rebelle 5:
The .zip file above contains a single profile. Extract the zip file to get the file “Rebelle-5-BasementPicasso.lp4”
Rebelle 6:
The .zip file above contains a single profile. Extract the zip file to get the file “rebelle-6-BasementPicasso.lp4”
Step 2 – Import the profile into Loupedeck
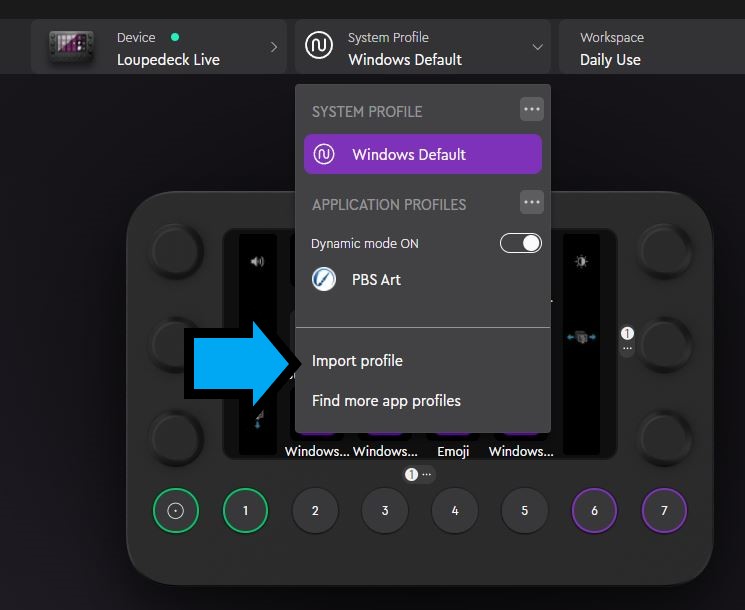
On the system profile dropdown, select “Import profile”
Browse to the file that you extracted in step (1)
Step 3 – Configure Rebelle Short-cuts
Due to a couple of conflicts on my system, I had to change a few of the default key configurations in Rebelle. In Rebelle 5 key configuration, make sure that your keys are set up as follows:
| Command (Keys) | Section | Key |
|---|---|---|
| Paint | Tools | 1 |
| Mix | Tools | 2 |
| Blend | Tools | 3 |
| Erase | Tools | 5 |
| Flip Viewport (Screen) | View | Shift + F |
| ReDo | Edit | F6 |
| Undo | Edit | F5 |
| Guides | View | Shift + Y |
| Colour Set | Window | F9 |
| Favourite Brushes | Window | F8 then Shift + B (macro) |
| Full Screen | View | Shift + Ctrl + F |
| Tablet Mode | Tab |
| Command (knobs) | Section | Key |
|---|---|---|
| Fit to Screen (Rotate Reset) | View | . {a full stop} |
| Rotate Counterclockwise | View | Ctrl + Shift + {left arrow} |
| Rotate clockwise | View | Ctrl + Shift + {right arrow} |
| Fit to Screen (Zoom Reset) | View | . {a full stop} |
| Zoom Out | View | Ctrl + Shift + O |
| Zoom In | View | Ctrl + Shift + I |
| Reset Brush Changes | Tools | Ctrl + Shift + H |
| Brush Size Increase | Tools | Ctrl + F1 |
| Brush Size Decrease | Tools | Ctrl + F2 |
| Increase Hue | Color | Ctrl + F3 |
| Decrease Hue | Color | Ctrl + F4 |
| Increase Saturation | Color | Ctrl + F5 |
| Decrease Saturation | Color | Ctrl + F6 |
| Increase Lightness | Color | Ctrl + F7 |
| Decrease Lightness | Color | Ctrl + F8 |
| Open Colour Dialog | Color | Ctrl + F9 |
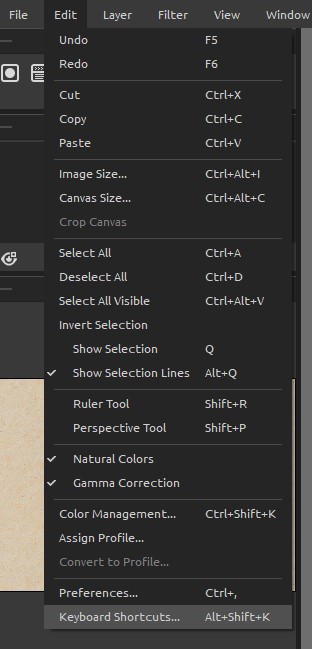
Select Edit -> Keyboard Shortcuts (or press Alt + Shift + K to open it directly)
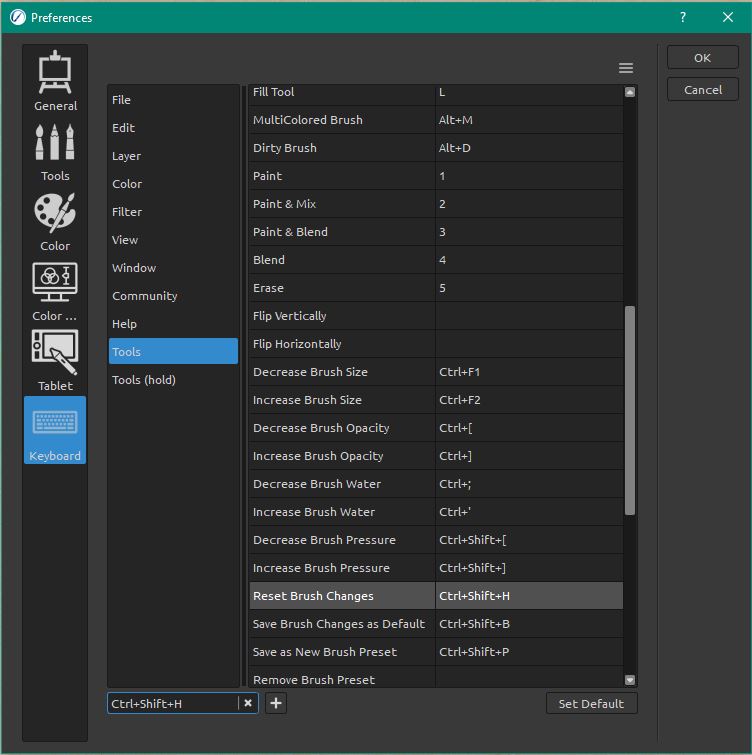
Selects the correct key section, for example “Reset Brush Changes” is under Tools
Make sure that the assigned key is as shown in the table above. If it prompts you that the combination is in use, confirm Ok to replace the existing use of that combination.
Further Customisation of Loupedeck
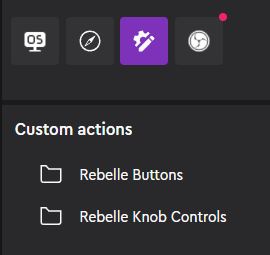
Hopefully, the guide above will get you up and running. This section explains how to add any specific custom controls that you might want to use. The controls that I have created in Loupedeck are macro functions for key presses and custom adjustments for knob controls. They are grouped into two folders. Rebelle Buttons are the visual keys, Rebelle Knob Controls are the rotary functions.
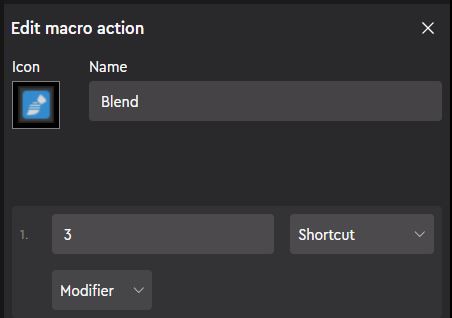
The macro buttons appear visually on the loupedeck. In the example on the right, the Blend function, when pressed, passes the key press “3” to Rebelle (i.e. as if the user had pressed “3” on the keyboard. The icon is the visual shown on the loupedeck key. Without an icon, the key will just show text
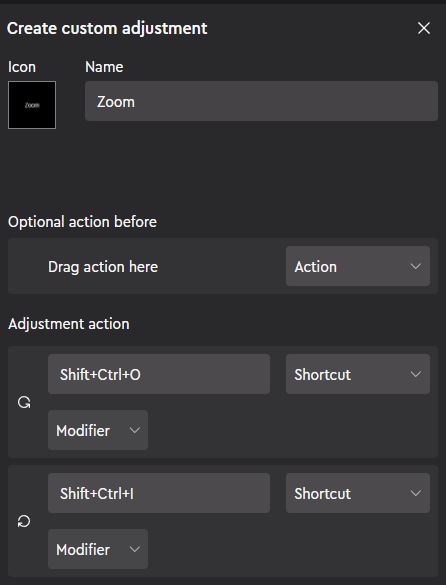
Rotary Keys, for example the Zoom function are slightly more complicated as they need to effectively send different key presses depending on whether you rotate clockwise or counter-clockwise. The top adjustment action is the rotate counter-clockwise, so in this case it sends Shift + Ctrl + O (for Zoom Out).
The icon (if used) will show next to the knob, otherwise the Name is used as text.
